Understanding the Process of Sanding, Staining, and Sealing
Hardwood floors are a timeless investment that can last for generations, but their longevity depends entirely on a high-quality finish. Hardwood floor finishing is the multi-step process of preparing bare wood and applying a protective topcoat. This barrier shields the wood from moisture, foot traffic, and UV damage while highlighting the unique grain patterns of species like oak, maple, or walnut. Whether you are installing new planks or restoring a historic floor, understanding the nuances of finishing is essential for a professional, durable result.
The Science of Wood Protection
Hardwood is a cellular, organic material that reacts to its environment. Without a proper finish, wood is “open,” meaning it can absorb spills, trap allergens, and expand or contract excessively with humidity changes. A professional finish serves two purposes: aesthetics and armor. By sealing the pores of the wood, you create a surface that is easy to sanitize and resistant to the mechanical friction of daily life.
Top Hardwood Finish Options
The “best” finish depends on your household needs, your patience for drying times, and your aesthetic goals. There is no universal right answer. Some homeowners prioritize maximum durability and low maintenance, while others prefer the natural appearance and feel of the wood, even if it requires more care. Water-based polyurethane, oil-based polyurethane, and hardwax or penetrating oil finishes each have their own strengths and ideal applications.
- Water-Based Polyurethane
Water-based poly is the current industry gold standard for residential homes. It is preferred for its fast drying time (2–4 hours) and low VOC emissions, making it safer for families and pets. Unlike older finishes, it dries completely clear, preserving the natural “wheat” colour of light woods like maple or white oak without the yellowing effect.
- Water-Based Polyurethane
- Oil-Based Polyurethane
Traditional and robust, oil-based polyurethane is known for its distinct amber glow. It adds a warm, classic depth to the wood that water-based versions cannot perfectly replicate. It is highly durable and cost-effective, though it requires a long drying time (8–24 hours) and carries a pungent odour during the curing process.
- Oil-Based Polyurethane
- Hardwax and Penetrating Oils
For a European, high-end look, many homeowners are turning to hardwax oils. Unlike polyurethane, which sits on top of the wood like a plastic sheet, oils soak into the fibres and harden. This creates a matte, organic feel where you can actually touch the wood grain. The biggest benefit is repairability; if a small area gets scratched, you can buff in a little more oil without refinishing the entire room.
- Hardwax and Penetrating Oils
The Hardwood Finishing Process: Step-by-Step
Refinishing hardwood is a precision-heavy task. Skipping a single step can lead to peeling, “orange peel” texture, or trapped debris.
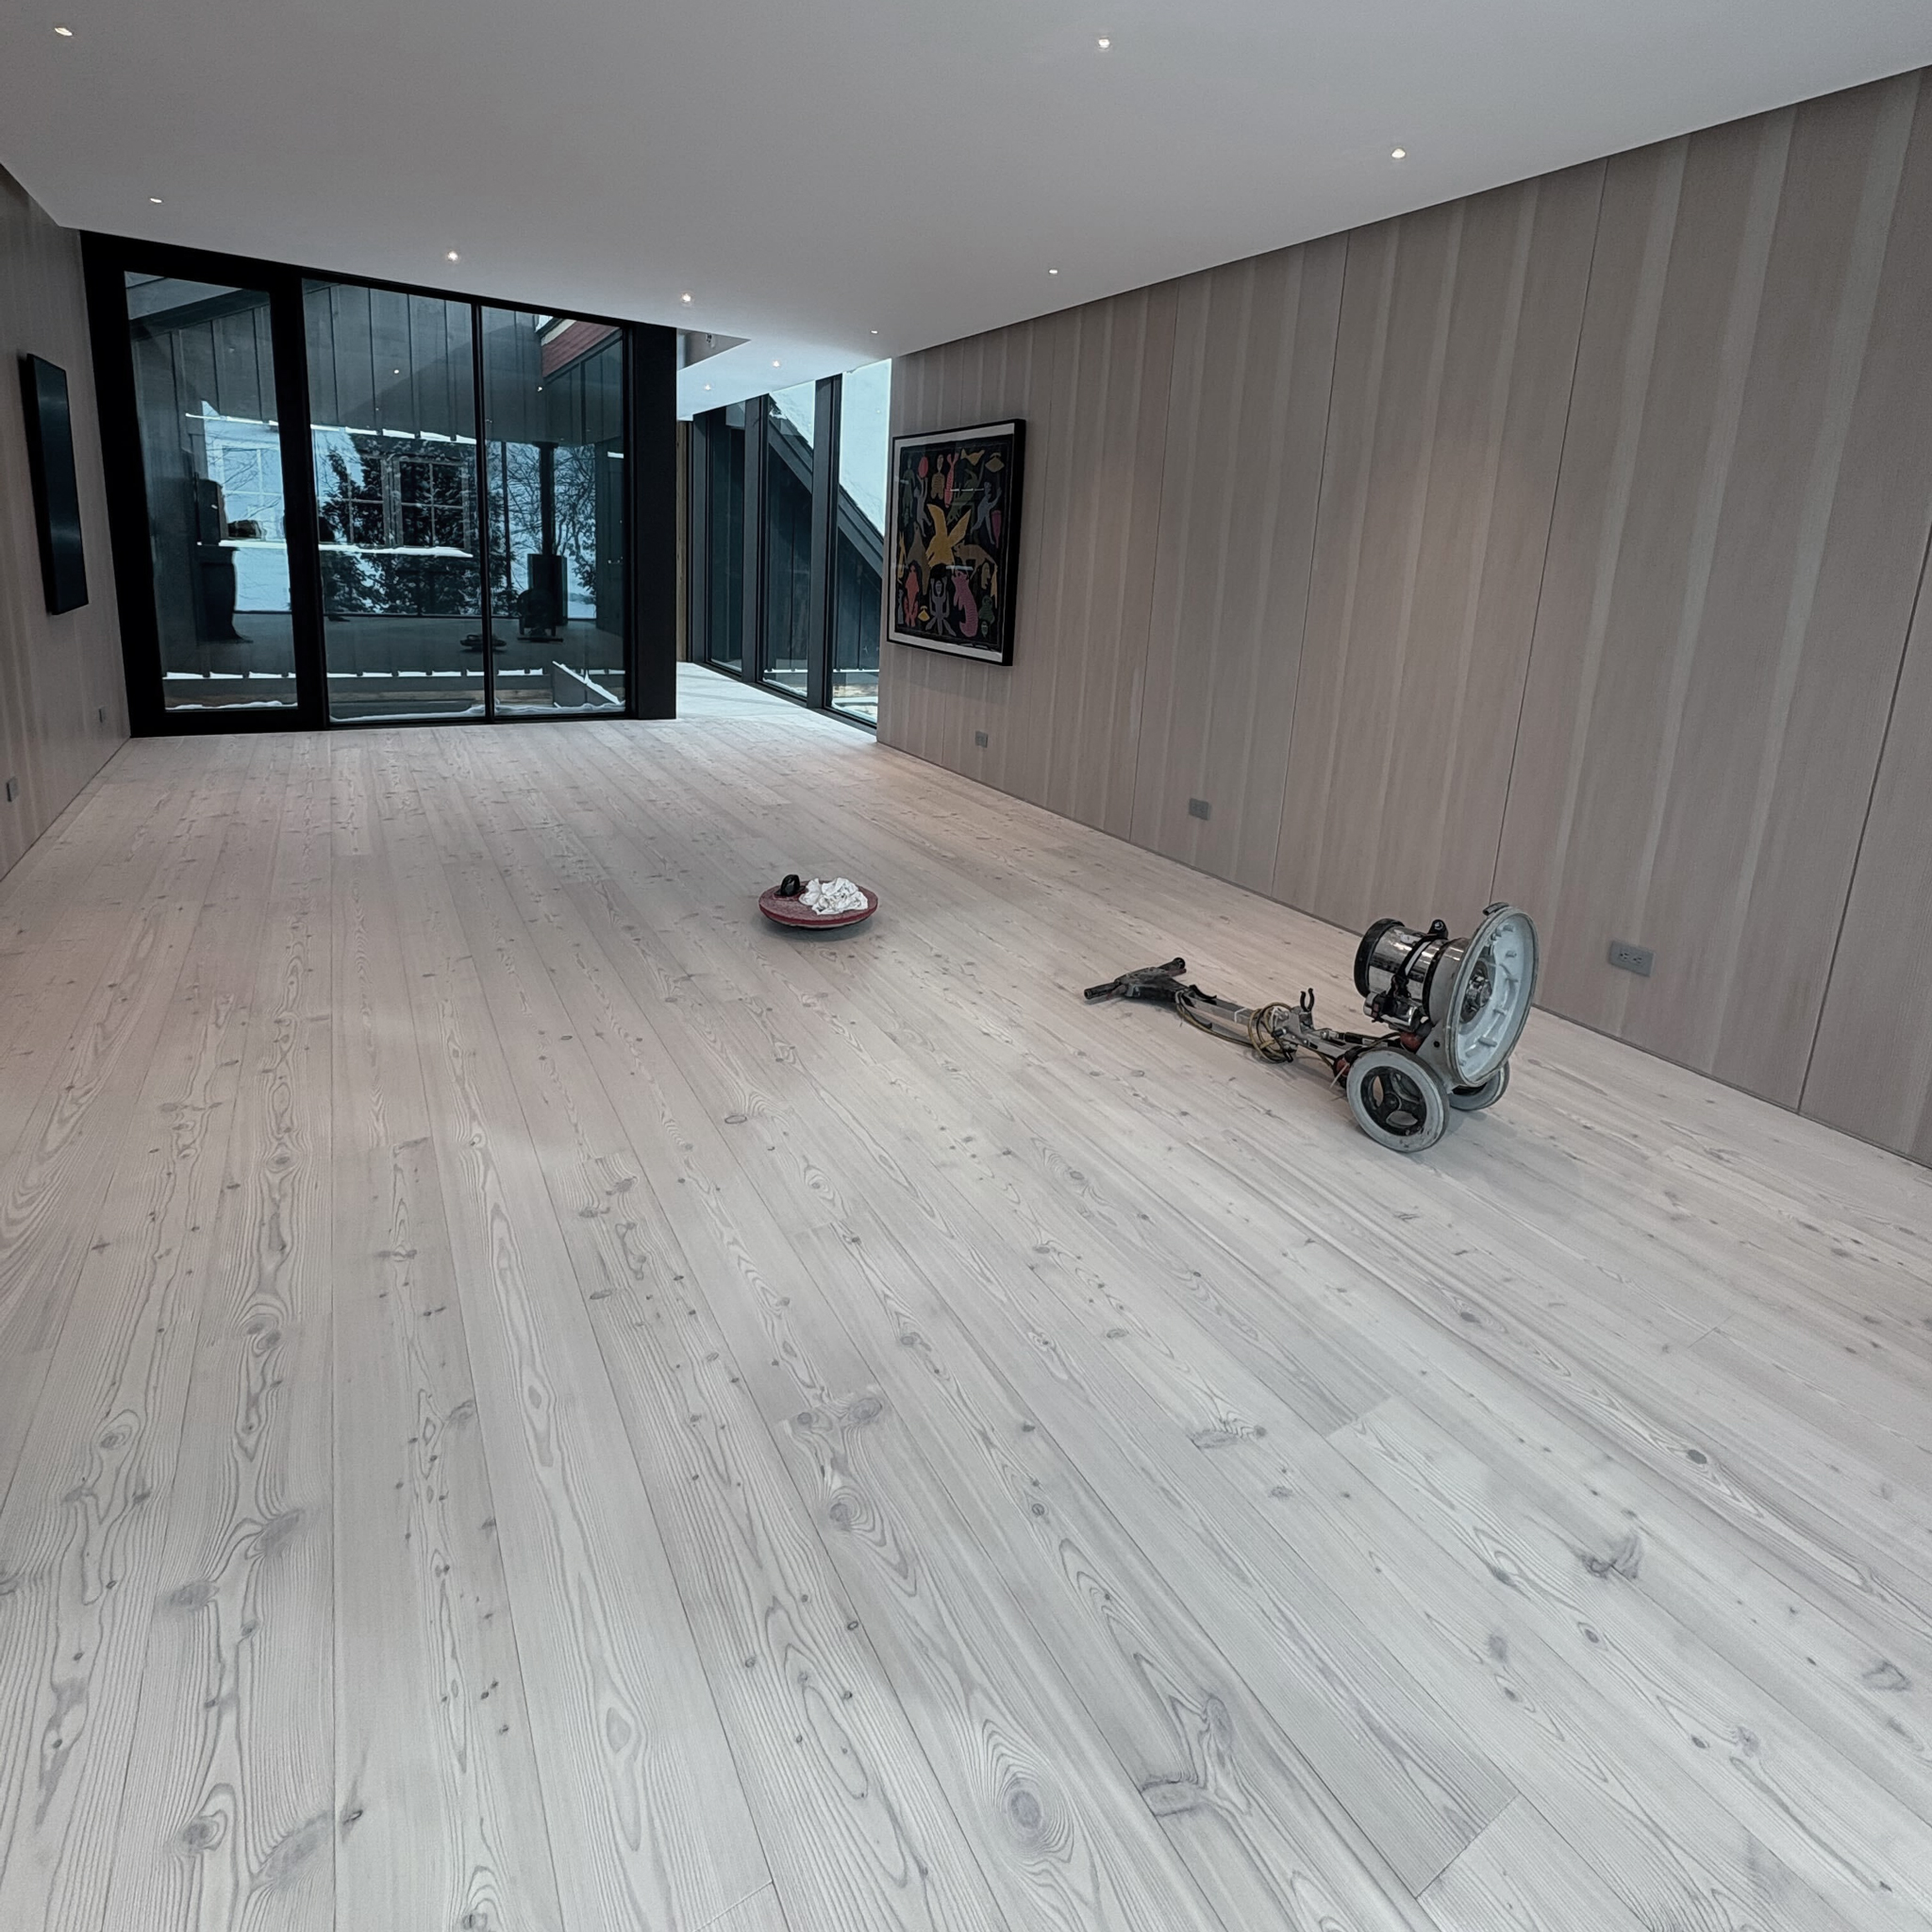
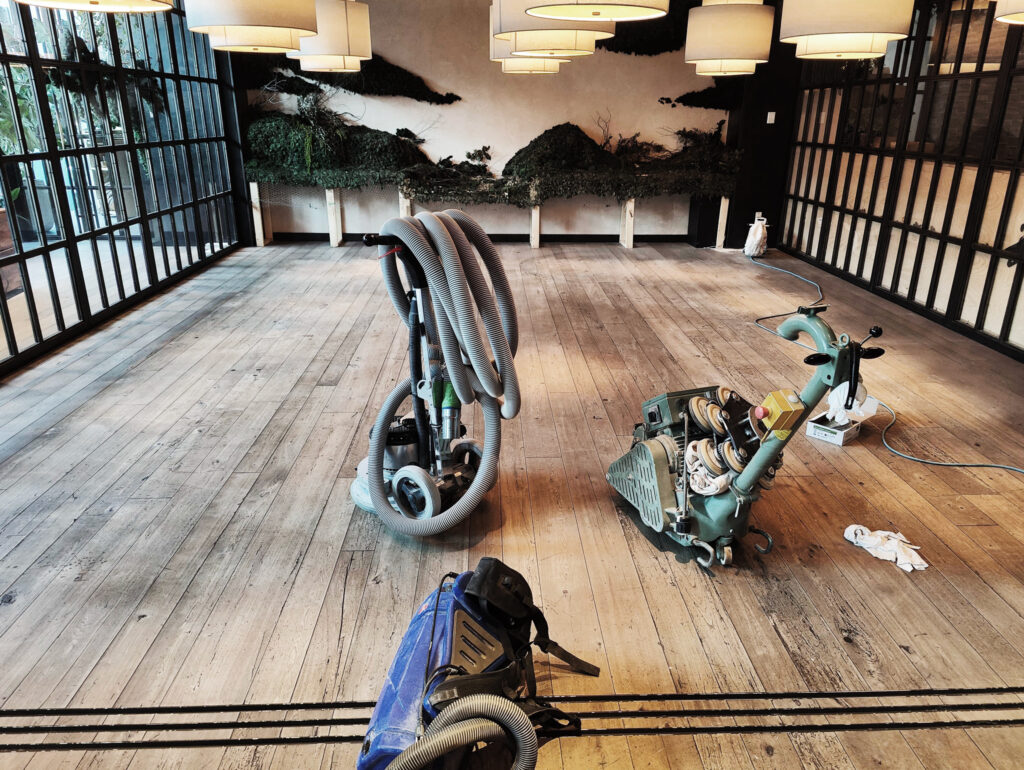
Phase 1: Sanding to Perfection
Please see previous page here.
Phase 2: The “Tack” Stage
After sanding, the floor must be surgically clean. Even a single hair or speck of dust will be magnified ten times once the finish is applied. Vacuum the floor multiple times, then use a tack cloth (a lint-free cloth dampened with mineral spirits or water, depending on your finish) to wipe every square inch.
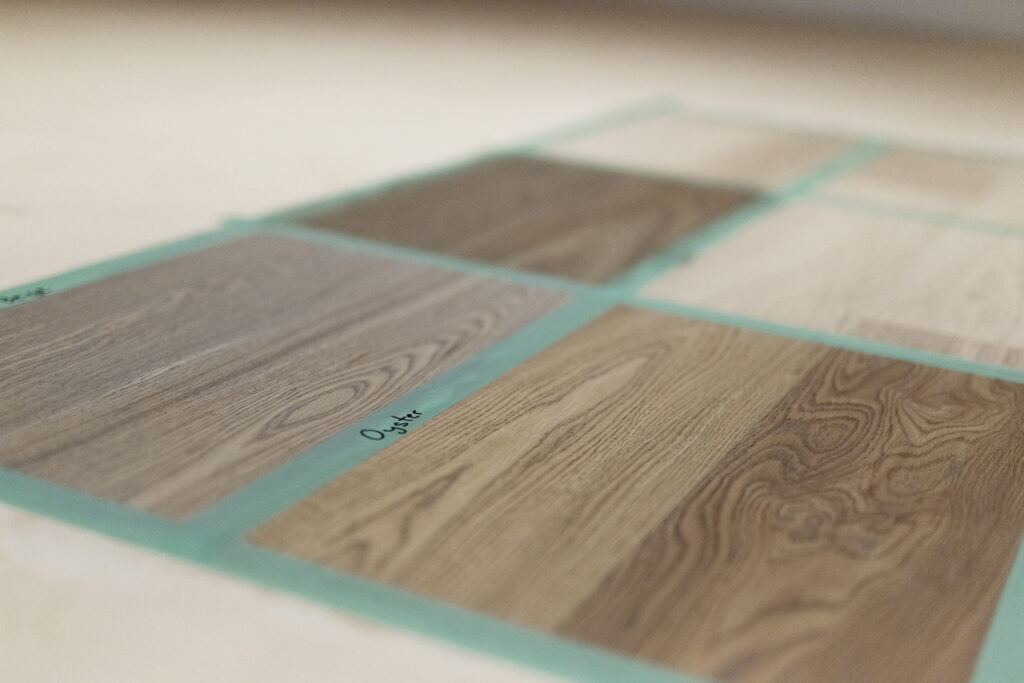
Phase 3: Staining (The Design Choice)
If you want to change the colour of your e.g. oak or pine, apply a penetrating stain. Use a rag or applicator to work the stain into the grain, then wipe off the excess. Ensure the stain is 100% dry—typically 24 hours—before moving to the sealer. Applying poly over damp stain is the most common cause of finish failure.
Phase 4: Sealing and Topcoating
Apply the first coat of finish using a T-bar, roller or a high-quality brush, working with the direction of the wood grain. Once dry, the wood fibres will often “stand up,” creating a rough feel (known as grain raise). Lightly sand the floor with a fine-mesh screen or 220-grit paper to knock these fibres down. Clean again, and apply at least two more coats.
Choosing the Right Sheen
The sheen level affects how much light your floor reflects and how much maintenance it will require.
- High Gloss: Very formal and shiny, but it can also show every footprint, pet hair, and scratch.
- Semi-Gloss: Offers a noticeable shine with slightly better camouflage for wear.
- Satin: The most popular choice. It has a soft lustre that hides dust and scratches effectively.
- Matte/Flat: No shine at all. It looks like raw wood and is excellent for high-traffic “rustic” homes.
- Never use steam mops: High-heat moisture can delaminate the finish and warp the wood.
- Avoid wax-based cleaners: These create a greasy buildup that makes it impossible to “screen and coat” the floor later.
- Use felt pads: Every chair and table leg should have a thick felt protector.
- Clip pet nails: Large dogs with long nails are the number one enemy of hardwood finishes.
- For hardwax and penetrating oil floors, use only the manufacturer’s recommended maintenance soap (such as Rubio Monocoat, WOCA, or Osmo products). Household cleaners can strip the protective oils and reduce the floor’s performance.
- Oil-finished floors may benefit from occasional maintenance oil in high-traffic areas to refresh protection and keep the floor looking its best.
Conclusion
Finishing hardwood floors is an art that blends heavy machinery with delicate chemistry. By choosing a high-quality polyurethane or oil and following a strict sanding regimen, you can protect your hardwood from the elements and create a stunning visual foundation for your home. Whether you want the modern clarity of water-based finishes or the deep warmth of traditional oils, a proper finish is what turns raw wood into a masterpiece.