Subfloor Leveling for Hardwood Installation
There is a way to tell whether a subfloor was done properly without seeing what is underneath and without using any tools, only your senses.
When you walk on a hardwood floor installed over a well-structured, properly levelled, and correctly secured subfloor, you immediately feel the difference. The floor feels solid, stable, and grounded beneath your feet. When the subfloor is poorly prepared, you may not see the problem, but you can feel it. There is a subtle sense of movement, hollowness, or inferiority that takes away from the quality of the space.
( A solid foundation) or In many ways, it is similar to great design. You do not need to be Picasso or an interior designer to walk into a well-designed room and feel good in it. The feeling comes naturally, even if you cannot explain exactly why. The same principle applies here. A properly prepared subfloor creates a sense of solidity and quality, while deficiencies create a sense of emptiness and cheapness that people subconsciously notice.
Nothing your eyes can see, but something your senses can feel.
Installing a premium hardwood floor transforms your home, adding value, warmth, and timeless elegance. However, the secret to a flawless, squeak-free hardwood floor does not lie in the quality of the planks you select. It lies entirely beneath them.
Preparing a flat, structurally sound foundation through subfloor leveling is the single most critical step in any flooring installation. Skipping this phase leads to gapping, early board damage, and annoying noises underfoot.
Why a Level Subfloor is Non-Negotiable
Hardwood planks are rigid structural elements. When you place a rigid board over an uneven surface, you create empty air pockets beneath the wood. Over time, everyday foot traffic forces the hardwood to flex down into these low spots.
This continuous deflection causes severe structural and aesthetic issues:
- Creaking and Squeaking: The movement friction rubs planks together, loosens fasteners, and breaks floor glue bonds.
- Tongue and Groove Damage: Heavy pressure on flexing boards snaps the delicate interlocking joints, causing irreversible separation.
- Cupping and Gapping: Unstable substrates alter how wood acclimates, forcing planks to bow, cup, or pull apart at the seams.
- Bouncy Planks: Floating engineered hardwood installations will feel spongy, cheap, and unstable underfoot.
Flattening vs. Leveling: Understanding the Difference
Many homeowners confuse “flat” with “level.”
- Level means a surface is perfectly parallel to the horizon line.
- Flat means a surface is a continuous plane without sudden high peaks or low valleys.
For successful hardwood installation, flatness is much more critical than levelness. A room can have a slight, uniform slope without impacting the integrity of the hardwood. However, dips, crowns, waves, and ridges within that slope will quickly ruin your new floor.
The Industry Standard Tolerances
According to the National Wood Flooring Association (NWFA), your subfloor must meet strict flatness tolerances before you install a single board:
- For boards under 3 inches wide: The floor must be flat within 1/4 inch over a 10-foot radius.
- For wide planks (3 inches or wider): The floor must be flat within 3/16 inch over a 10-foot radius.
How to Test Your Subfloor for Flatness
You cannot accurately judge a subfloor’s flatness with the naked eye. Use this simple mapping technique to locate trouble areas:
- Clean the surface: Sweep away all drywall dust, plaster drops, and construction debris.
- Use a long straightedge: Lay a 10-foot professional straightedge or a perfectly straight spirit level across the floor.
- Slide a tape measure: Pivot the straightedge across the room. Look for visible gaps underneath it.
- Mark the map: Use a pencil or chalk to draw circles around low valleys. Shade over high crowns or ridges.
Leveling Wood Subfloors (Plywood or OSB)
If your home has a wood joist system covered with plywood or Oriented Strand Board (OSB), use these targeted techniques to flatten the surface.
1. Fix Structural Weaknesses First
Never attempt to level over a bouncing, rotted, or loose subfloor. Walk the room and listen for squeaks. Drive deck screws through the plywood directly into the underlying floor joists to secure any moving panels. Replace any water-damaged or delaminated wood.
2. Sand Down High Spots
High spots are typically found at subfloor seams where panels swell from humidity. Use a heavy-duty orbital floor sander equipped with 36-grit sandpaper to grind down ridges, crowns, and high joints until they match the surrounding field.
3. Fill Low Spots with Layered Underlayment
The classic method for many years: For deep depressions in wood subfloors, avoid thick pours of liquid self-leveler, as wood naturally expands and can crack rigid cementitious compounds. Instead, use roofing felt (tar paper) or high-grade underlayment shim panels to fill low valleys.
- Layer the felt paper into the center of the dip.
- Step the layers outward to create a gradual, smooth ramp.
- Staple the layers securely to the wood deck.
Leveling Concrete Subfloors
Concrete slabs are prone to settling, pits, waves, and cracks. Preparing a concrete slab requires a completely different approach.
1. Address Moisture Levels
Concrete acts like a giant sponge. Test your slab using a calcium chloride kit or a pinless moisture meter. High moisture levels require a specialized liquid-applied vapor barrier before you pour leveler or glue down hardwood.
2. Grind Down the Peaks
For aggressive high points, concrete high-spots, or old mortar beds, rent a concrete floor grinder equipped with a diamond-matrix wheel. Always wear an approved respirator to protect against hazardous crystalline silica dust.
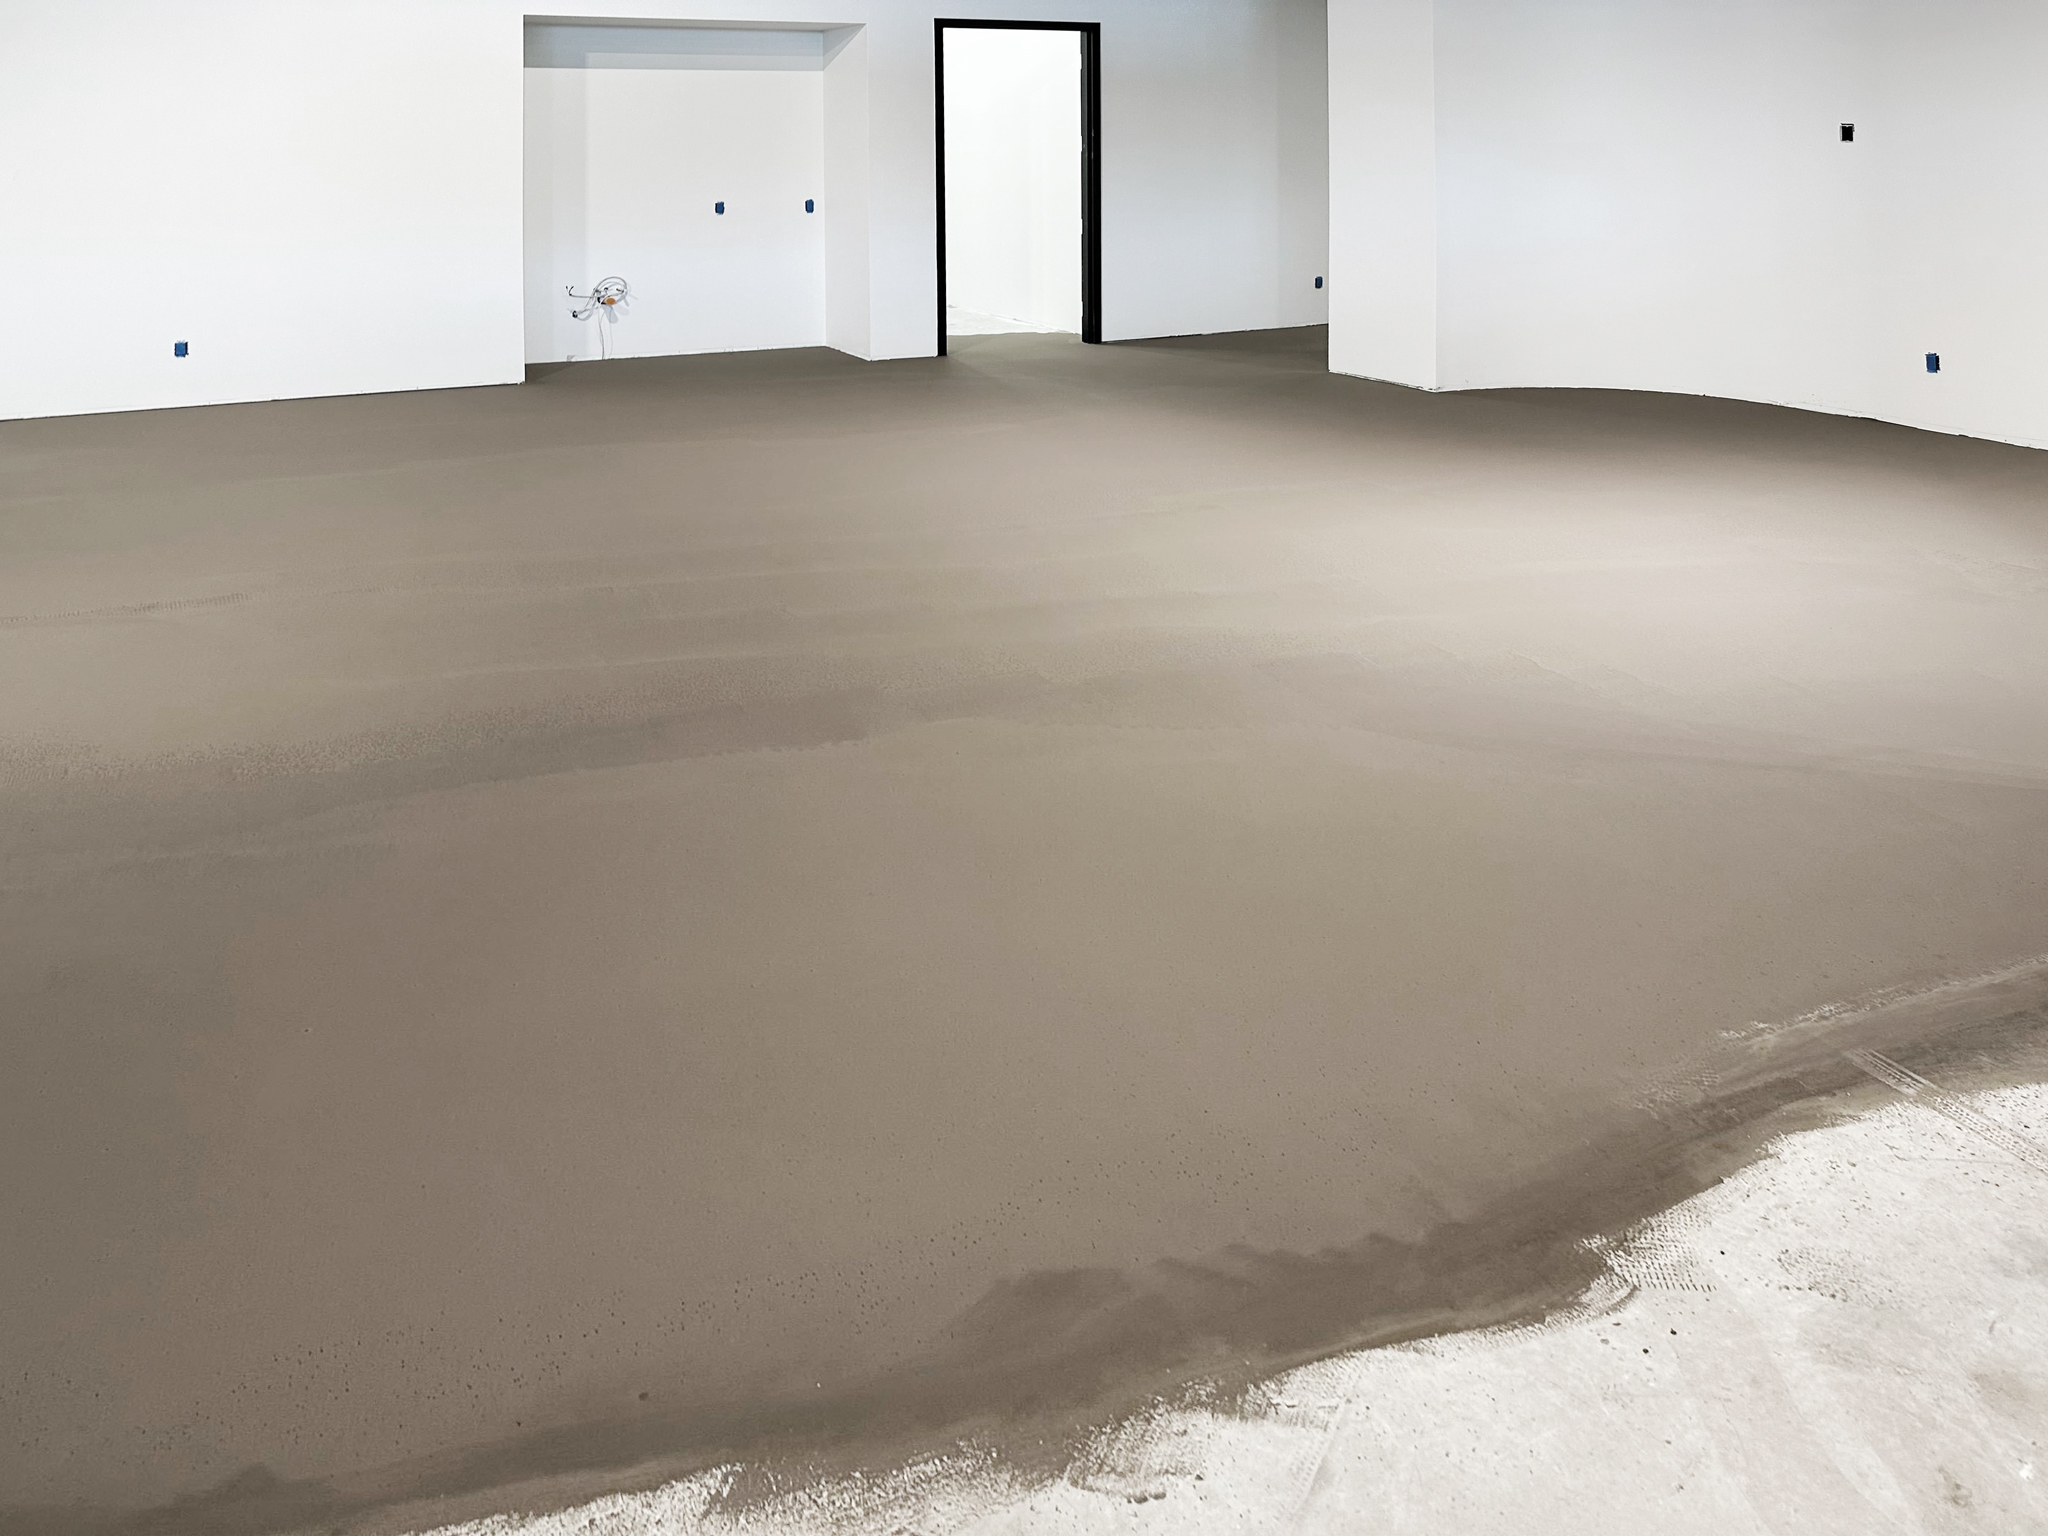
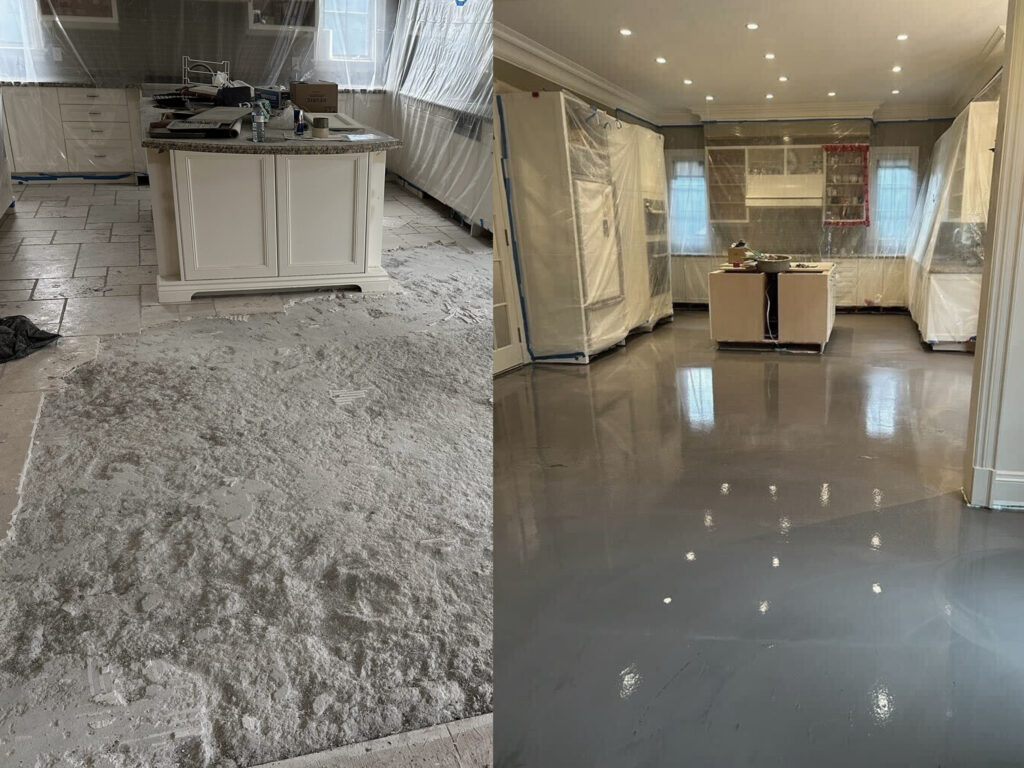
3. Use Self-Leveling Underlayment (SLU)
For deep valleys and widespread unevenness, liquid self-leveling cement is the most effective solution.
- Apply Concrete Primer: Roll a high-tack concrete primer over the entire clean slab. This prevents the dry concrete from sucking water out of the leveler too quickly.
- Mix Precisely: Follow the manufacturer’s exact water-to-powder ratios. Too much water ruins the structural strength of the cured cement.
- Pour and Guide: Pour the liquid compound into the low zones. Use a gauge rake or a spiked roller to help the product flow evenly and pop any trapped air bubbles.
Essential Subfloor Leveling Tools Checklist
Before beginning your preparation work, ensure you have these vital tools on hand:
- 10-foot professional aluminum straightedge
- Heavy-duty mixing drill with a mud paddle
- Spiked roller or gauge rake (for concrete levelers)
- Handheld or walk-behind concrete grinder
- Coarse 36-grit floor sander
- Premium polymer-modified self-leveling underlayment
- Concrete acrylic bonding primer

Frequently Asked Questions
Can I use regular joint compound or wood putty to level a subfloor?
No. Drywall joint compound and standard wood fillers completely lack the compressive strength required to support heavy flooring and foot traffic. They will pulverize into fine powder under the hardwood, resulting in loose planks and massive structural failure.
Do I need to level the floor if I am using a thick underlayment pad?
Yes. Foam, cork, and rubber underlayments are designed to dampen sound and reduce minor thermal transfer. They are not structural fillers. A thick foam underlayment will compress into low spots under weight, actually worsening the flexing and bouncing of your hardwood planks.
How long does self-leveling cement take to dry before hardwood installation?
While most self-leveling compounds are safe to walk on within 4 hours, they retain moisture for much longer. For nail-down or glue-down solid hardwood flooring, you must allow the leveler to fully cure—typically between 24 to 72 hours—and run a moisture test to verify it is completely dry before laying wood.
Final Thoughts: Invest in the Prep Work
Subfloor preparation is a tedious, dusty process, but it dictates the lifespan of your flooring investment. Taking the time to properly sand high zones, patch deep valleys, and verify flatness tolerances guarantees your new hardwood floors remain stunning, quiet, and solid for generations to come.